Friday, November 29, 2013

Eggnog Snickerdoodles with a Creamy Nutmeg Glaze

How was your Thanksgiving?  What was your favorite dish at the table?  Mine ended up being something I never imagined would taste so good.  A Buttermilk Pie that my F.I.L. made.  It tasted completely opposite of what you would imagine.  It is a sweet, custard-base pie, that is baked in the oven, which creates a sugary crusty topping.  Serve it with a little whipped cream and it is rich and creamy and absolutely delicious.  You could even serve it with sliced bananas, strawberries, raspberries, chocolate shavings or whatever.  

He even sent me home with a few extra pieces and I'm not sharing :)  

But I will share these cookies with you.
I try to buy only one carton of eggnog each year.  It's just something I have to limit myself with, because I LOVE the stuff and I will drink every last drop in that carton and then move onto the next one.

Since it isn't even December yet, I had to mimic the flavors without actually using the real thing.

These cookies don't actually have eggnog in them, but the flavor is similar to homemade eggnog (which does taste different that store-bought).  Combine rum extract and nutmeg and you have instant eggnog flavor.

If you are not a nutmeg fan, then you might not like these cookies.  You could always use cinnamon instead, but then they won't taste like eggnog.

They are soft and chewy and have a light eggnog flavor.  

You might also Like:
Eggnog Snickerdoodles with Nutmeg Glaze
From: Jenn@eatcakefordinner
(Printable Recipe) or (Printable with Picture)

1/2 c. unsalted butter, room temperature
1 c. sugar
1 1/2 tsp. rum extract (or rum bakery emulsion)
1 1/2 tsp. vanilla extract
1 egg
1/2 c. evaporated milk
2 3/4 c. all-purpose flour
1/2 tsp. salt
1/2 tsp. baking soda
1 tsp. cream of tartar
3 Tbl. sugar + 1/2 tsp. ground nutmeg, for rolling

Nutmeg Glaze:
1 c. powdered sugar
1 Tbl. evaporated milk, plus more if needed
1 - 2 tsp. vanilla extract, to taste
1/4 tsp. ground nutmeg, or to taste

Preheat oven to 350 degrees.  Cream together butter and sugar until very light and fluffy.  Mix in the rum extract, vanilla extract and the egg until well combined.  In a separate bowl, combine the flour, salt, baking soda and cream of tartar.  Add the dry ingredients to the creamed mixture alternately with the evaporated milk, starting and ending with dry.  Mix until just combined.  In a small bowl, combine 3 Tablespoons of sugar with 1/2 teaspoon of ground nutmeg; set aside.  Roll dough into 1 - 1 1/2-inch balls and roll in sugar/nutmeg mixture.  Place on a greased baking sheet.  Use the bottom of a cup to flatten the dough balls.  They do not spread much during baking, so make sure to flatten them.  Bake for 11-12 minutes.  Remove to a wire rack and cool completely.  Yield: 3 - 3 1/2 dozen cookies.  

For the Glaze: Whisk together all ingredients until smooth.  If it is too thick, add a little more evaporated milk (a little goes a long way).  Drizzle over cooled cookies.  Sprinkle with a tiny amount of nutmeg, if desired.  Store in an air-tight container.    

Jenn's Notes: I used Rum Bakery Emulsion in the cookies which is a water based extract instead of alcohol, so supposedly the flavor won't bake out as much.   

Linked up at Weekend Potluck!

Saturday, November 23, 2013

10 Roll Recipes for Thanksgiving

Since Homemade Rolls are the most important part of Thanksgiving Dinner :) I put together a list of 10 delicious recipes for you (in no particular order).  I have made Roll #8 Our Best Bites' Dinner Rolls for the past two Thanksgivings and everyone loves them.

Thursday, November 21, 2013

Leftover Turkey Cheesesteaks

This has got to be the BEST.WAY.EVER. to use leftover Thanksgiving turkey.  No more same old leftover turkey noodle soup or regular turkey sandwiches.  I'm not messing around here :)  These Turkey Cheesesteaks taste just like the ones you get at the Mall.

Both "The Mr." and I loved them so much we ate them two nights in a row and would have probably went for three nights, but the turkey was all gone.

This is a perfect way to transform that boring leftover Thanksgiving turkey into a family favorite.

Pass the leftovers my way.
Leftover Turkey Cheesesteaks
From: Jenn@eatcakefordinner
(Printable Recipe) and (Printable with Picture)

1 Tbl. oil
1 green bell pepper, diced
1/3 c. onion, finely chopped
1 large garlic clove, minced
leftover turkey, chopped (around 3 cups)
1 tsp. Mrs. Dash (yellow lid)
1 tsp. Italian seasoning
pepper, to taste
1/2 tsp. Shirley J chicken bouillon, opt.
2 roma tomatoes, diced
8 slices Provolone cheese
3 oz. cream cheese, softened
4 hoagie buns, toasted

Heat oil in a large skillet over medium heat.  Add the diced green pepper and onion and cook for a few minutes or until tender.  Add the minced garlic and saute 30 more seconds.  Add the chopped turkey, Mrs. Dash, Italian seasoning, pepper and Shirley J chicken bouillon (if adding) and cook until turkey is heated through.  Last, add the diced tomatoes.  Taste and adjust seasonings, if needed.  Spread cream cheese over both sides of toasted hoagie buns.  Load up with turkey filling and top each with two slices of Provolone cheese.  Place sandwiches on a baking sheet and place in a warm 350 degree oven for a few minutes until cheese is melted. Slice in half and serve.  Serves: 4  

Jenn's Notes: We sauteed our veggies in coconut oil which gave them an awesome flavor, but any type of oil will work.  I love Shirley J chicken bouillon, because it is less salty than other bouillon and it adds a rich flavor to the dish. 

Monday, November 18, 2013

Oven Roasted Turkey Breast

I had never made a roast turkey before.  I make Roast Chicken all of the time, but it's almost Thanksgiving and I am long over due for attempting my own turkey.  I went with a turkey breast, because I could get one that was only 3 pounds.  I did not need a 20 pound turkey for just the two of us.

All you do is make a rub, apply it to the turkey and bake.

It turned out moist and flavorful and we served it alongside mashed potatoes and Honey Butter Rolls.  Plus, I also made this Lion House Chocolate Cream Pie.  Yeah . . . we pretty much had a mini Thanksgiving dinner last weekend and it was FABULOUS.  You should try it :) 

I can't wait to show you what I did with the leftover turkey. 

Oven Roasted Turkey Breast
slightly adapted from: Ina Garten
(Printable Recipe) or (Printable with Picture)

1 (3 Lb.) boneless turkey breast
1 large clove garlic, minced
1 tsp. dry mustard
1 1/2 tsp. dried rosemary
1/2 tsp. dried thyme
1/2 tsp. poultry seasoning
1 tsp. kosher salt
1/2 tsp. black pepper
1 tsp. Mrs. Dash (yellow lid), opt.
a few dashes of Worcestershire sauce
1 Tbl. olive oil
juice of half a lemon
1 c. low-sodium chicken broth
2 celery stalks, chopped, opt.
1 carrot, chopped, opt.

Preheat oven to 350 degrees.  Combine minced garlic, all seasonings, Worcestershire sauce, olive oil and lemon juice to form a paste.  Rub all over the turkey breast.  Place turkey on a rack that is over a baking sheet (or use a roasting pan).  Place chopped celery and carrot in the bottom of the baking sheet and pour in the chicken broth.  Bake for around 1 hour and 15 minutes or until internal temperature registers 175 degrees on an instant-read thermometer.  I would check it several times, so you don't overcook it.  Allow to rest about 10 minutes before slicing.

To make gravy: Add turkey drippings and 2 Tablespoons of butter to a medium saucepan.  When butter is melted, stir in 2-3 Tablespoons of flour until a paste forms.  Cook for a few minutes, stirring frequently.  Slowly whisk in 2 cups of water or chicken broth.  Continue cooking until it reaches desired consistency.  If more flavor is needed, add some chicken bouillon.  Season with salt and pepper, to taste.   

Jenn's Notes:  If your turkey breast comes in a netting, remove it to apply the rub and then place the netting back on.  My turkey breast came with a gravy packet, but we opted to make our own.  The majority of the liquid evaporated in the baking sheet, so I added a little more broth, while it was still hot, to whisk up the drippings for my gravy.  

Linked up at Time to Sparkle and Tuesday Talent Show! and Weekend Potluck!

Thursday, November 14, 2013

The Lion House Chocolate Cream Pie

My friend made me this delicious pie for my Birthday last year.  It comes from the old Lion House Cookbook.  I found myself a used copy on Amazon not too long ago and it is full of fabulous recipes.

The Lion House is an incredible Bakery here in Utah that has been around forever.

They have the most mouth-watering dinner rolls, orange rolls, pies, soups, sandwiches and so much more.  My go-to Zucchini Bread recipe is from The Lion House. 
This pie couldn't be any easier to make.  You mix everything in a pan and cook it on the stove until it's thickened.

The end result is a thick and rich and silky smooth filling.
I'm not a huge regular pie crust person and I am terrible at making them, so I opted for a homemade Nilla Wafer crust, which I love.  You can use whatever type of crust you want (Graham Cracker, Regular, Nilla Wafer, Chocolate Cookie Crust, etc . . . ).    
I love my Chocolate Cream Pie with whipped cream and mini chocolate chips.  "The Mr." chopped up some white chocolate chips to serve over his.  It would also be incredible garnished with toffee bits and caramel sauce.  Or how about with a peanut butter whipped cream?  Oh my, I can think of so many awesome ways to serve this pie.

However you chose to serve yours, it will be DIVINE.  
Lion House Chocolate Cream Pie
adapted from: The Lion House
(Printable Recipe) or (Printable with Picture)

1 c. sugar
5 Tbl. cornstarch
1/4 tsp. salt
2 1/2 c. milk
3/4 c. half-and-half
3/4 c. chocolate chips (I used milk chocolate)
3 egg yolks, beaten
1 tsp. vanilla extract
2 Tbl. unsalted butter
whipped cream, for serving
1 prepared pie crust, any type

In a 3-quart saucepan stir together the sugar, cornstarch and salt.  Slowly whisk in the milk and half-and-half.  Add the chocolate chips.  Heat over medium heat until chocolate is melted and mixture thickens, stirring constantly.  You know it is thick enough if it coats the back of a wooden spoon and when you run the back of another spoon through it, the line stays and does not run back together.  Gradually add about 1/2 cup of the hot mixture to the egg yolks while whisking constantly.  Then, pour the egg yolk mixture back into the saucepan.  Whisk and continue cooking for another two minutes.

Remove from heat and stir in the vanilla and the butter.  Stir until butter is melted.  Pour into prepared pie crust.  Cover with plastic wrap, pressing it directly onto the surface of the pie and refrigerate until set; around 4 hours.  Serve with whipped cream and chocolate shavings or mini chocolate chips.

Nilla Wafer Pie Crust
60 Nilla Wafers
6 Tbl. unsalted butter, melted

Preheat oven to 350 degrees.  Pulse cookies in a food processor until fine crumbs.  Pour crumbs into a 9'' or 10'' pie plate and add the melted butter.  Toss crumbs and butter together with a fork until it is all evenly coated in butter.  Press evenly along the bottom and slightly up the sides of your pie plate.  Bake in preheated oven for 10-12 minutes.  Cool completely.    

Linked up at Weekend Potluck! and Time to Sparkle! and Tuesday Talent Show!

Monday, November 11, 2013

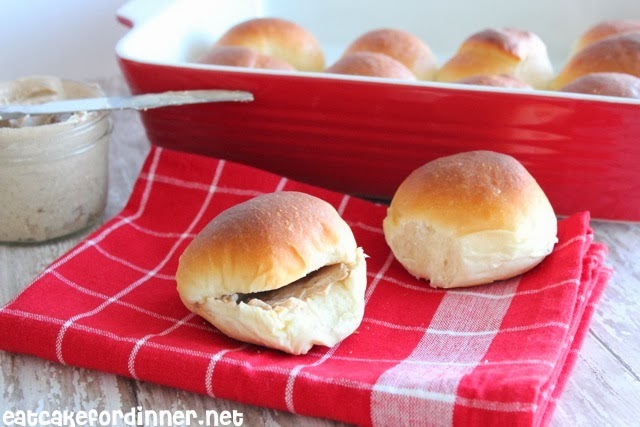
No-Knead Make-Ahead Honey Butter Dinner Rolls

You guys, this is a fabulous roll recipe for Thanksgiving.  You can make the dough the night before.  One less thing to worry about the day of.  

This recipe comes from the ever-so-talented Averie, the same Averie that has an incredible book dedicated to peanut butter - love it :)

I baked a batch of these honey butter smothered rolls the first night and I tried a batch the next morning, after refrigerating the dough overnight.  They were both delicious, but honestly, I liked the 2nd batch better.  They are soft and light.

These rolls are definitely the way to go if you are new to roll making or even if you want to cut back on the stress of making a million dishes Thanksgiving day.  I mean really . . . you mix the dough with a wooden spoon after all.  

You don't need a mixer, you don't have to knead the dough for more than a few seconds and you don't have to roll out the dough to cut into rolls.
I woke up Sunday morning, got my other half of dough out of the fridge.  Formed into balls and placed in a warm oven for a quick-rise method.  I watched 1 1/2 cooking shows and by that time, the rolls had risen and were ready to bake.  Within an hour and a half of waking up, you can have a warm honey butter roll in your hand and the scent of fresh baked bread roaming throughout your house with very little hands on time.  SO STINKIN EASY.   

I do have another Overnight Dinner Roll Recipe that is delicious too, if you want to have a couple recipes on hand.
Honey Butter Dinner Rolls
adapted from: Averie Cooks
(Printable Recipe) or (Printable with Picture)

7/8 c. water (scant 1 cup), warmed
2 1/4 tsp. instant or active dry yeast
2 large eggs
1/4 c. canola or vegetable oil
1/4 c. honey
pinch of salt
3 1/4 - 3 1/2 c. all-purpose flour

Honey Butter
1/4 cup (4 Tbl.) unsalted butter, softened
2-3 Tbl. honey

Pour warm water into a large mixing bowl and sprinkle the yeast over the top (I also add a pinch of sugar or a small amount of honey to help activate the yeast).  Allow to sit for 5 minutes.  It should be very frothy and bubbly.  If it isn't, then start over.  

Add the eggs, oil, honey and salt and whisk to combine.  Add 3 cups of flour and stir with a wooden spoon until combined.  Add up to 1/2 cup of additional flour, as needed.  Dough should be slightly sticky to the touch and it should pull away from the sides of the bowl as you stir.  Stir dough for one minute.  It will be thick and lumpy.  Form dough into a ball in the center of the bowl.  Cover with plastic wrap and place in a warm, draft-free, place to rise until doubled, about 2 hours.  

At this point you have two options.  
If you plan to bake now: Punch down dough, remove it from the bowl and turn out onto a floured surface.  Knead it only so much as necessary to shape it into balls for rolls (about 15-20 seconds).  Cut dough in half and cut each half into 8 pieces.  You will get 16 rolls total (around the size of a golf ball or slightly larger).  Place balls in a greased baking dish.  9 rolls will fit in an 8x8-inch baking dish.  Allow to rise until doubled, about 1 hour.  For the honey butter: combine butter and honey and stir together until smooth and creamy.  Carefully put a small dollop on top of each roll.  As they bake, the honey butter will melt all over the roll.  Bake at 350 degrees for 18-20 minutes.  Tops will be lightly golden.  Serve with remaining honey butter.

If you plan to bake another time:  After dough has risen two hours, punch down and cover with plastic wrap. Refrigerate up to 5 days.  When ready to bake, remove from the refrigerator and form into 16 balls.  Place dough balls into a greased baking dish.  9 rolls will fit in an 8x8-inch dish.  Allow to rise until doubled.  For the honey butter: combine butter and honey and stir together until smooth and creamy.  Carefully put a small dollop on top of each roll.  As they bake, the honey butter will melt all over the roll.  Bake at 350 degrees for 18-20 minutes.  Tops will be lightly golden.  Serve with remaining honey butter.                 

Jenn's Notes:  I like to let my dough rise in a warm oven to speed up the process.  I turn my oven on to 350 degrees and allow it to heat for a few minutes, then I turn off the oven and place the rolls inside.   

Warm Water Tip: I hold my hand under the running tap water.  It should be very warm, but not so hot that you have to pull your hand away.  I always make sure the yeast is bubbly and frothy before I add any other ingredients.   

Linked up at Weekend Potluck! and Tuesday Talent Show!

Friday, November 8, 2013

Steve's Wife's Sweet Potato Casserole

This is another fabulous dish that comes from one of my co-workers.  Last year, we had a Thanksgiving luncheon at work and as soon as I tasted these sweet potatoes, I had to know who made them.

I twisted Steve's arm and reminded him every time I saw him until he finally agreed to get the recipe from his wife.

Lucky for you . . . I'm sharing it with all of ya'll today.
Since I think sweet potatoes are one of the best side dishes ever created, I know I will be trying many different recipes, so I need to be able to keep track of which one is which (hence the name Steve's Wife's Sweet Potato Casserole).

These sweet potatoes are so incredibly amazing.  They are rich and so comforting.  The topping gets extra crunchy and is the perfect compliment to those creamy sweet potatoes.  
This casserole re-heats really well.  Just pop it in a 350 degree oven until it is heated through.  It tastes just as good as when it was first baked.

The two of us finished off this whole casserole in 3 days.  Yep, we sure did and I don't feel bad about it one bit . . . it is just too good :) 

For a time saving tip - you can always bake the sweet potatoes the night before, cool and peel them and place in a air-tight bowl.  Then, prepare and bake the casserole the next morning.
Steve's Wife's Sweet Potato Casserole
adapted from: Steve G.
(Printable Recipe) or (Printable with Picture)

3 sweet potatoes (around 3 1/2 - 4 cups)
1/4 tsp. salt
1/2 tsp. cinnamon
4 Tbl. unsalted butter, melted
2 eggs
1 tsp. vanilla
1/2 c. sugar
2 Tbl. heavy cream

Topping:
4 Tbl. unsalted butter, softened
3 Tbl. flour
3/4 c. light brown sugar, packed
1/2 c. pecans, chopped

Preheat oven to 350 degrees.  Pierce sweet potatoes with a fork several times and place on a baking sheet.  Bake until softened, about 45 minutes - 1 hour, depending on the size of your potatoes.  Remove from oven and allow to cool.  When cool, peel and place in a large mixing bowl.  Add the salt, cinnamon, melted butter, eggs, vanilla, sugar and cream.  Beat with a hand mixer for a minute or two until everything is combined and creamy.  Spread evenly into a lightly greased 9x13-inch baking dish.

For the topping:  Combine butter, flour and brown sugar in a small bowl.  Mix with your fingers until it is the consistency of coarse meal (I used cold butter and a pastry cutter to blend the ingredients together).  Stir in the chopped pecans and sprinkle mixture evenly over sweet potatoes.  Bake in preheated oven for 30 minutes.  Serves: around 10.

Linked up at Weekend Potluck! and Tuesday Talent Show!

Tuesday, November 5, 2013

Restaurant-Style Shredded Pork Enchiladas

We were blown away with how GOOD these enchiladas were.  They tasted like something straight out of a Mexican restaurant.

We have been on such an enchilada kick lately and have been trying so many different versions from chicken to ground beef and now shredded pork.  All versions are amazing.

The rub for this pork is one I use often and is just about the same as the one I use for My Favorite Shredded Pork Tacos.  I have served this homemade creamy red enchilada sauce several times over beef enchiladas, but this was the first time I served it over pork enchiladas.

The two paired perfectly together.  Serve them on a big plate with a side of Mexican Rice and refried beans and it will look and taste like a restaurant meal.  
Restaurant-Style Shredded Pork Enchiladas
From: Jenn@eatcakefordinner
(Printable Recipe) or (Printable with Picture)

Pork
1 - 1 1/2 lbs. boneless country style pork ribs
1 1/2 tsp. chili powder
1 1/2 tsp. cumin
1/2 tsp. garlic powder
1/2 tsp. dried oregano
2 Tbl. brown sugar
1/2 tsp. salt
freshly ground black pepper
1 Tbl. finely chopped onion
1 Tbl. apple cider vinegar
1 Tbl. extra virgin olive oil

Enchilada Sauce
3 Tbl. unsalted butter
3-4 Tbl. all-purpose flour
1 (14.5 oz.) can low-sodium chicken broth
1 (10 oz.) can red enchilada sauce 
3/4 tsp. cumin
1/2 c. sour cream (I use light)

For Serving: 
6-8 corn or flour tortillas
2 c. Monterey Jack cheese, shredded
chopped cilantro

For the Pork: Trim fat from pork.  Combine remaining ingredients to form a paste and rub all over pork ribs.  Cover with plastic wrap and allow to marinate for at least an hour or up to overnight.  Place in a dutch oven and add about 1/2 cup - 3/4 cup of water or chicken broth.  Cook in a 300 degree oven for 2 1/2 - 3 hours or until meat easily shreds with a fork.  When done, remove pork to a separate bowl and shred, adding some of the juice from the dutch oven.  

For the Enchilada Sauce:  Melt butter in a large skillet over medium heat.  Whisk in the flour, one Tablespoon at a time, until a thick paste forms.  Allow to cook for several minutes to cook out the flour taste, stirring frequently.  Slowly whisk in the chicken broth.  Continue whisking until it is smooth and creamy.  Cook for a few minutes or until slightly thickened.  Add the enchilada sauce and cumin.  Cook for another 5-10 minutes or until desired thickness is reached.  Stir in sour cream.  Reduce heat to low. 

To Prepare:  Preheat oven to 350 degrees.  Add about 1/2 cup of sauce to a baking dish.  Heat tortillas in the microwave for 15-30 seconds or until pliable.  Divide shredded pork evenly between tortillas.  Top each with a little cheese and chopped cilantro.  Roll up and place seam-side down in a baking dish.  Cover with remaining sauce and remaining cheese.  Bake for 15-20 minutes or until cheese is melted and bubbly.  Then, broil for a few minutes to brown the cheese on top.  Serve.  

Jenn's Notes:  The number of enchiladas you will get will depend on the size of the tortillas you use and how full you fill them.  I can fit up to 6 enchiladas in an 8x8-inch casserole dish.  

Popular Posts

that give mcdonalds coupons and 
breakfast coupons you also can find recipe from